vDAQ Multiple Imaging Arm Acquisition
The vDAQ supports imaging from two separate Galvo-Galvo (GG) or Resonant-Galvo-Galvo (RGG) microscope arms simulatenously. With this functionality, one can have multiple imaging arms that are focused in different cortical regions and simulatenously acquire activity images from both arms using a single vDAQ card.
When imaging from two independent imaging arms that are controlled by one vDAQ, two instances of ScanImage will be used. Each instance of ScanImage will have it’s own configuration and Machine Data File (MDF), and will be used to control acquisition from a single arm.
Configuration Procedure
Open one single instance of MATLAB.
Run
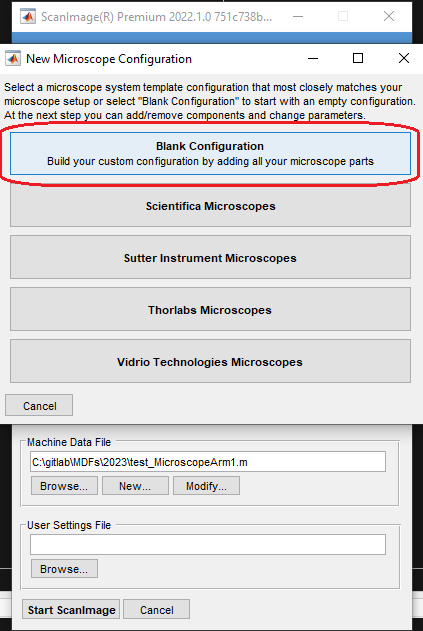
scanimageand create a new Machine Data File (MDF). Name it accordingly, e.g. MicroscopeArm1.mSelect “Blank Configuration”
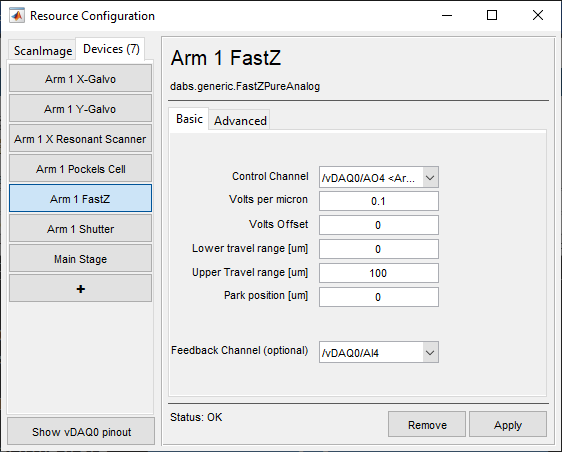
Add the Galvos, Resonant Scanner, and relevant microscope components for the first imaging arm. If there is only one stage associated with the microscope, it is commonly added to imaging arm 1. In single-stage configurations, only one instance of ScanImage will control the stage (e.g. the ScanImage instance for imaging arm 1).
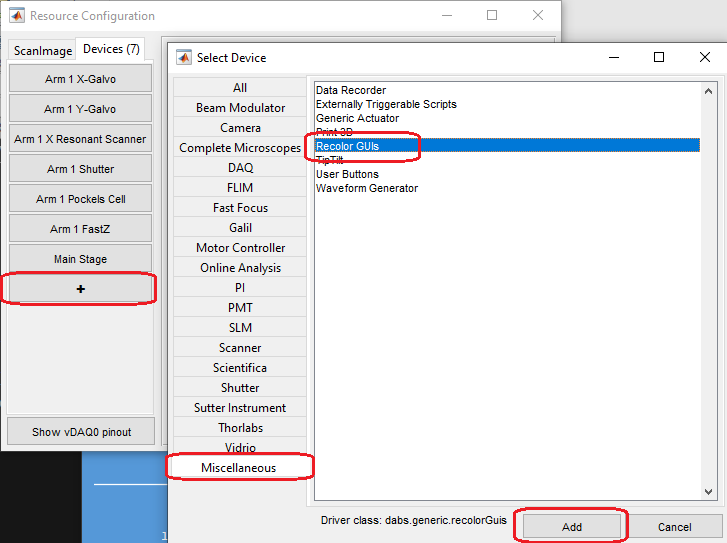
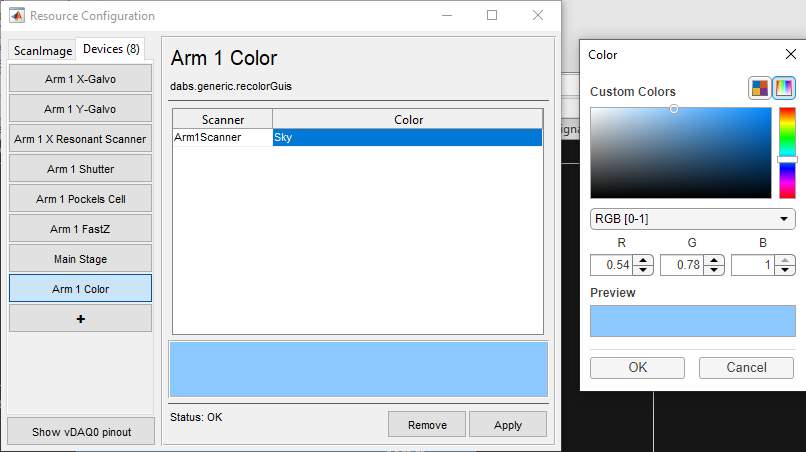
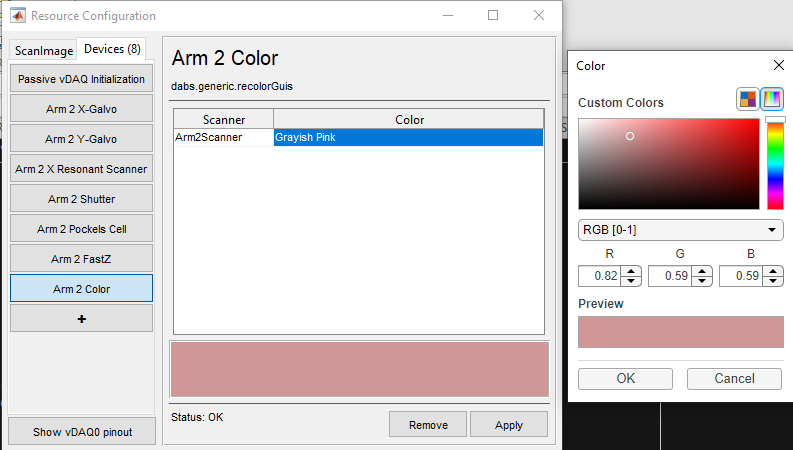
(optional) Add a Recolor Guis device to help differentiate this arm’s ScanImage instance from the other instance, then choose the background color for the first arm.
Add the vDAQ Scan System for arm 1.
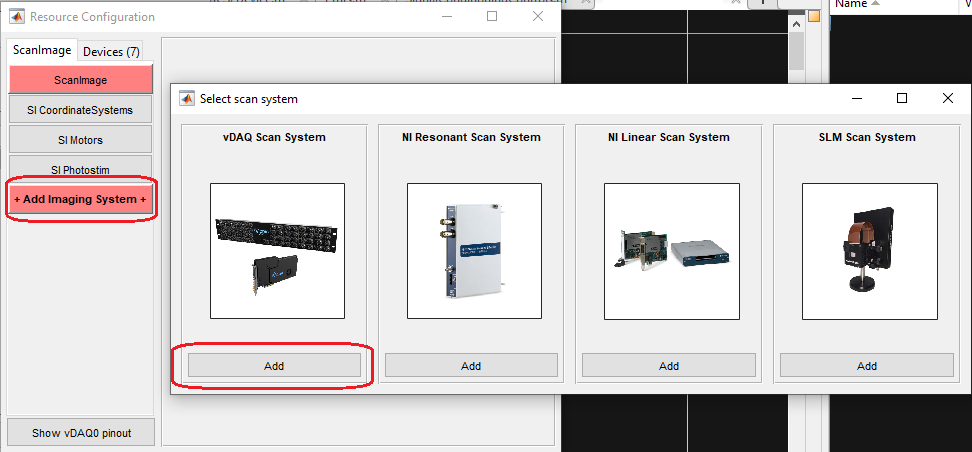
Set up the scan system so that it is controlling the components added for arm 1.

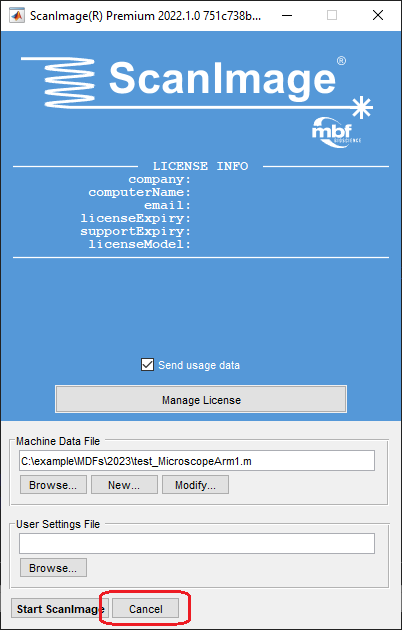
Once you are comfortable with the setup of arm 1, press “cancel” instead of “Start ScanImage” to start the configuration of arm 2.
Run
scanimageand create a new MDF for microscope arm 2 (for example MicroscopeArm2.m)Select “Blank Configuration”
Add the Galvos, Resonant Scanner, and relevant microscope components for the second imaging arm.
(optional) Add a Recolor Guis device to help differentiate this arm’s ScanImage instance from the other instance, then choose the background color for the second arm.
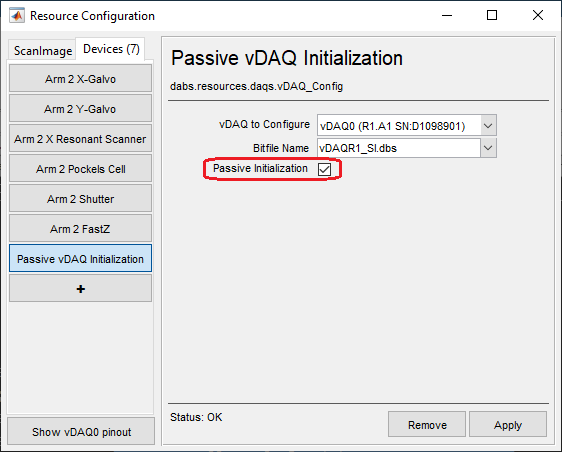
Add a “vDAQ Advanced Parameters” device. Name it something like “Passive vDAQ Initialization” for context.
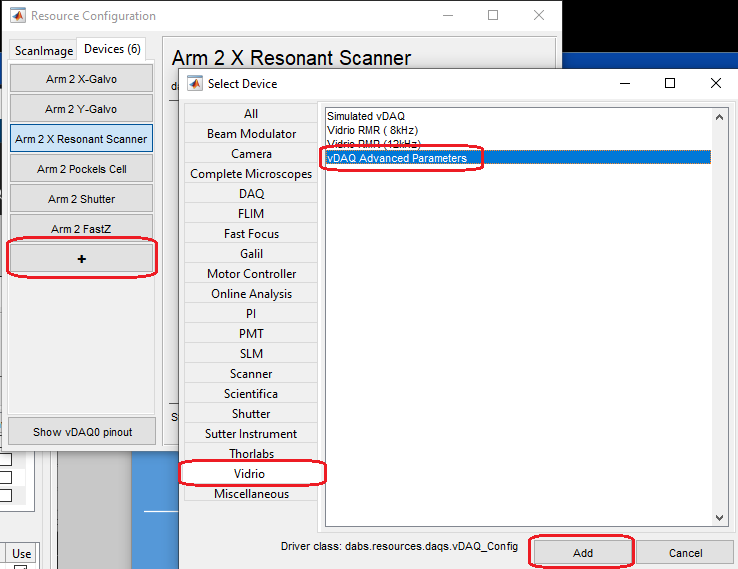
Set the vDAQ Advanced Parameters to configure “vDAQ0”, select bitfile “vDAQR1_SI.dbs”, and make sure the “Passive Initialization” checkbox is checked.
Add the vDAQ Scan System and set it up so that it is controlling the components added for arm 2.

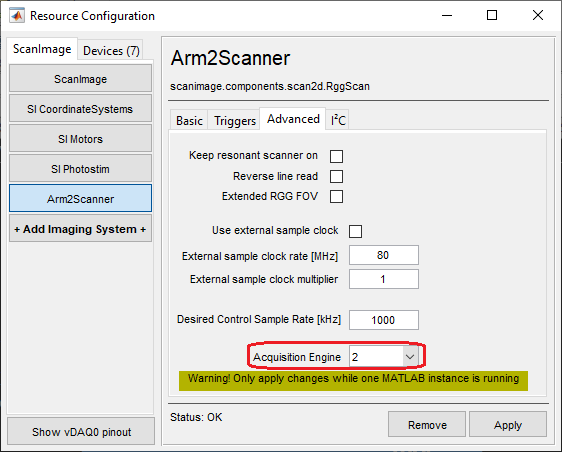
Go to the “Advanced” tab of the vDAQ Scan System configuration and select Acquisition Engine 2, then click apply.
Warning
It is important to not change this setting while other instances of ScanImage are running. Please only configure one instance at a time.
Now both acquisition arms are configured. We can proceed to the startup procedure.
It is common to also configure User Settings and User Configuration files for each separate arm. Once ScanImage has been started for the first time, you can configure the system in the way you like, e.g. Window positions, channel configurations, etc. Then you can save those settings by clicking the “Save” buttons in the main window:

Startup Procedure
Open a MATLAB instance for imaging arm 1.
Run
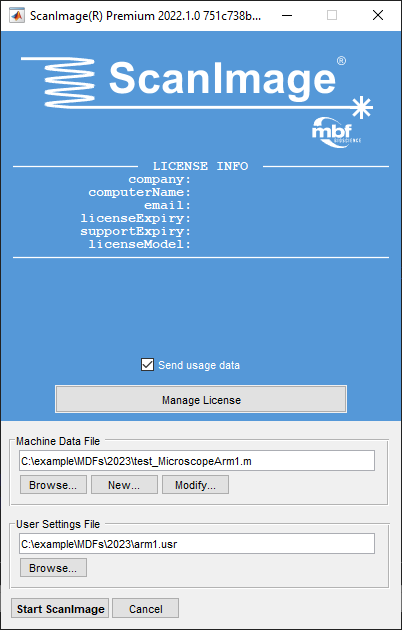
scanimageand choose the appropriate Machine Data File (MDF) and the user settings file (if created) for the first arm.Click Start ScanImage
While the first arm is starting, open a second MATLAB instance for imaging arm 2.
Wait for the first instance to completely start up. Then run
scanimagein the new instance and choose the Machine Data File (MDF) and user settings file created for the second arm.Click Start ScanImage

Note
Because we selected that arm 2 is the “Passive Initialization” arm, we must start the ScanImage instance for arm 1 first, then arm 2 second.
Helpful Tips
It is recommended to use two monitors, and have each ScanImage instance dedicated to it’s own monitor.
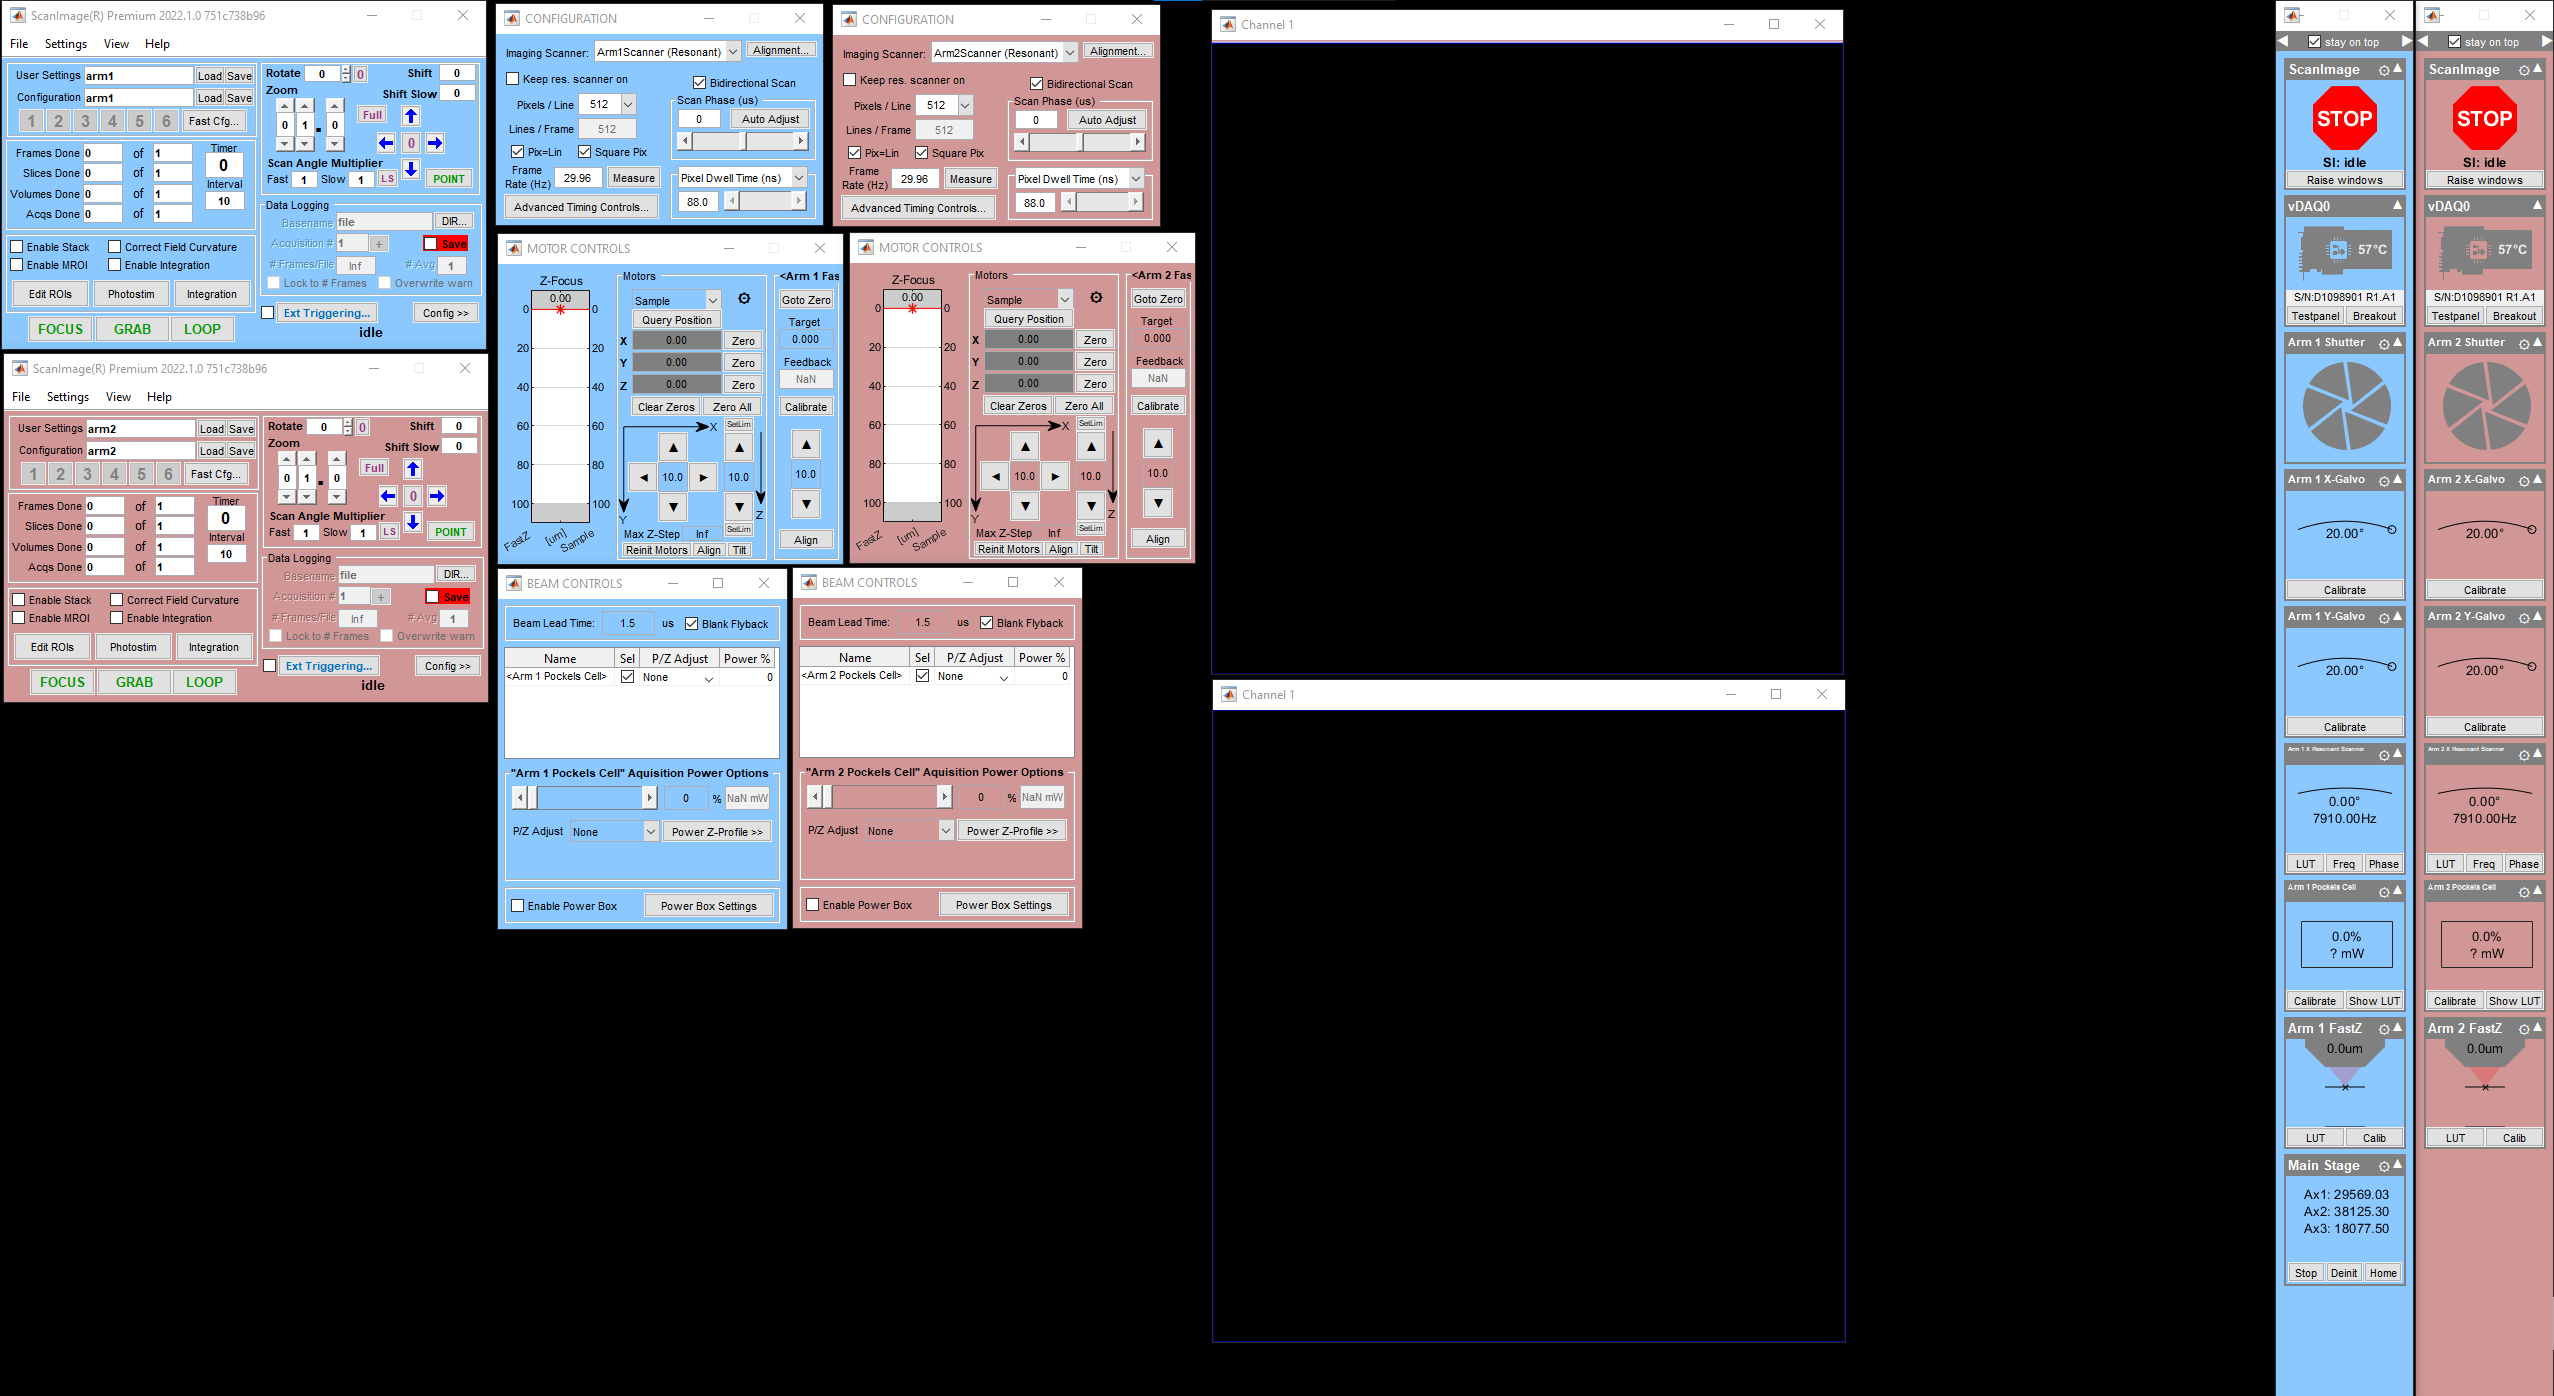
Recoloring GUIs is highly recommended, it is a quick way to determine exactly which window corresponds to which imaging arm.
Example Window Configurations
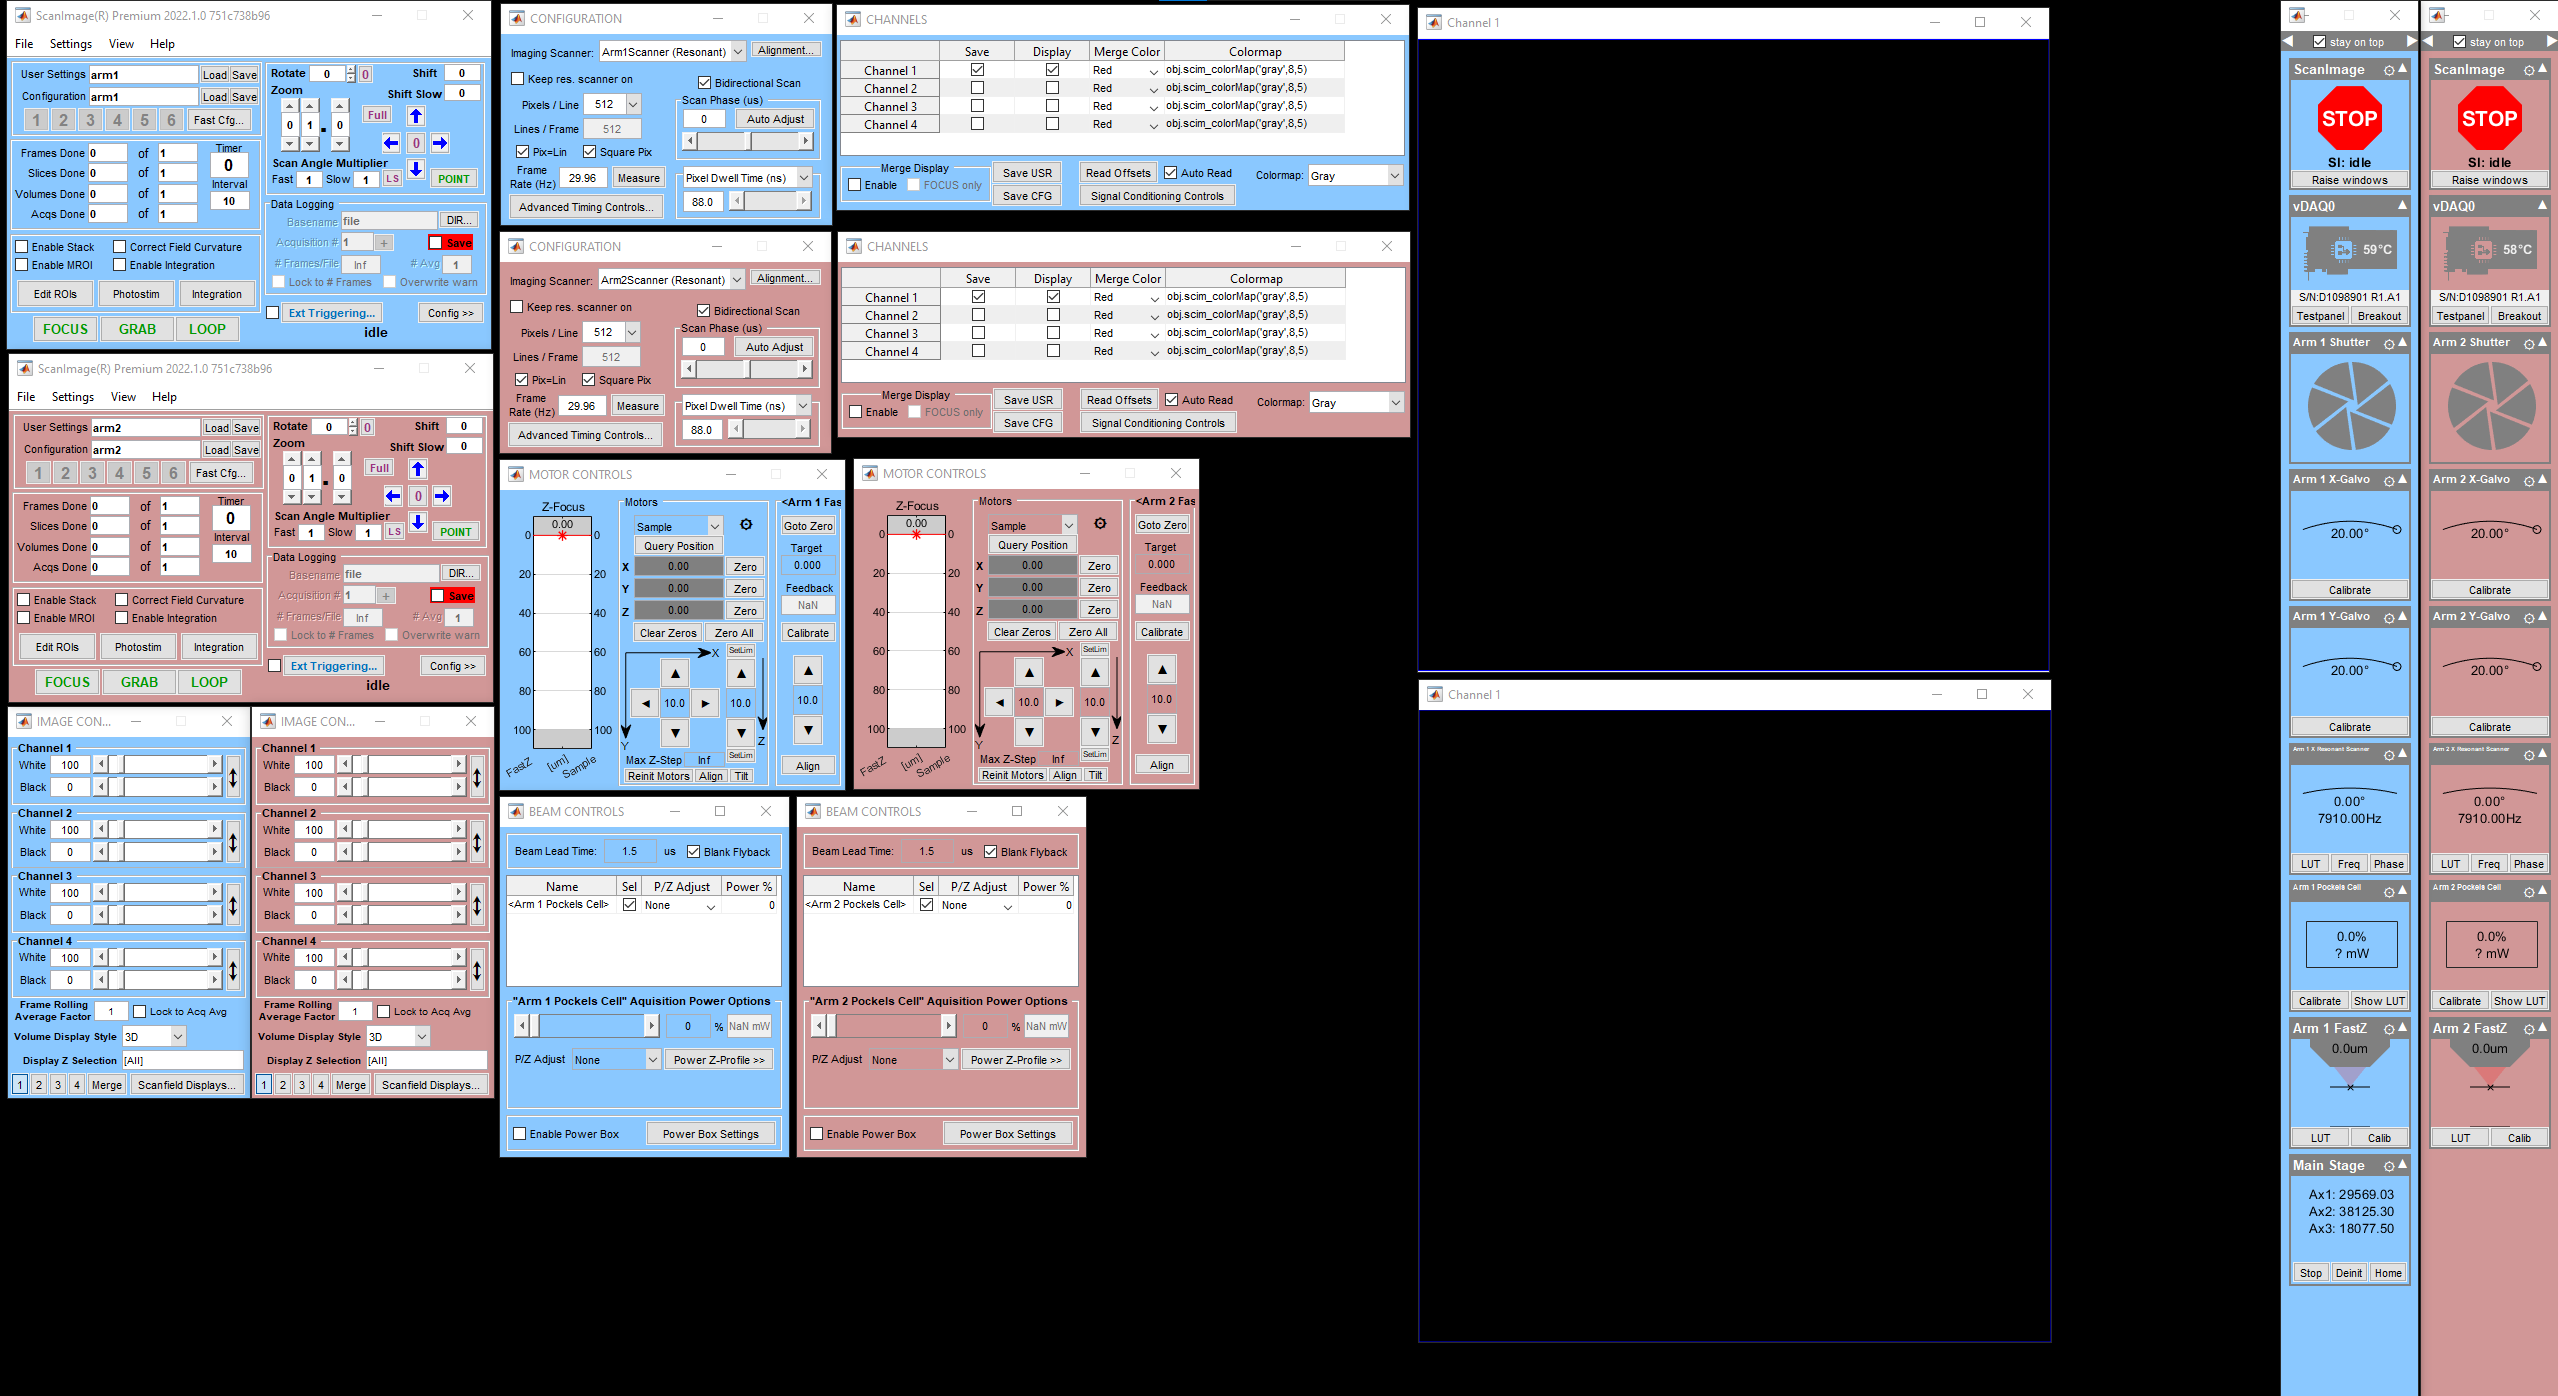
This example configuration has all of the default Windows included, which can use a lot of screen space. Note how the colors differentiate the ScanImage instances.
This example configuration does not include the Channels or Image Controls windows to save on screen room.
Saving window locations across multiple monitors is supported in ScanImage as well, so allocating 1 or more screens per instance of ScanImage is another good way to organize windows.