Camera Tab
Keyboard Shortcuts
Shortcut |
Description |
|
Start or stop reading frames from the camera |
Camera Controls Panel
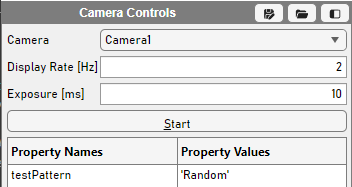
Table Column |
Description |
Camera |
Select which camera to view from out of Cameras added. Note You can view from a single camera at a time. |
Display Rate [Hz] |
The desired rate at which frames are updated in the Viewport. This accepts values from 0.05 Hz (every 20s) to 30 Hz (every 33 ms). Note This is impemented via a fixed rate MATLAB timer with busy mode configured for ‘drop’. Thus, if the queue is busy when the frame should be updated, it will not update until the queue is no longer busy. |
Exposure [ms] |
Sets the exposure of the camera in milliseconds. This affects the brightness of the image and also the upper bound of the frame rate of the camera. |
The table provides settings that are specific to the particular camera. These will vary based on camera model.
For docs on camera settings refer to documentation for the particular camera. If it is a camera brought in via micromanager, you may consult documentation for that particular camera implementation from micromanager.
Camera Histogram
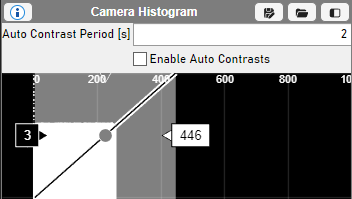
Table Column |
Description |
Auto Contrast Period |
Amount of time to elapse between consecutive calls to automatically set the contrast when a Enable Auto Contrast is checked. |
Enable Auto [Hz] |
Starts a fixed rate timer that makes calls to set the contrast according to the latest histogram data. |
Histogram Controls
The histogram has several controls for interacting with it - they are the same as interacting with the Scanner’s imaging channels histograms.
Display
Use the mouse wheel to zoom in and out.
Control:
To set the black and white bounds of the contrast, left click and drag the markers to the left and right of the highlighted range.
To pan the view, double click and drag.
To move the black and white bounds together, left click and drag the highlighted range.
To change the gamma, click and drag the circle in the center of the highlighted range to the left or right.
To control transparency of the image, drag the downward pointing triangle that is centered between the bounds.
Right Clicking anywhere in the histogram reveals 4 options labeled with their keyboard shortcuts:
Table Column |
Description |
[ |
Hides the image channel. For the camera, this should not be used. Instead, you should toggle visibility from the Layers panel of the Display auxiliary tab. |
[ |
Sets the contrast of the image to the minimum and maximum pixel values in the current image. |
[ |
Select the color to render image data with using MATLAB’s uisetcolor interface. |
Colors |
Select from basic colors, including:
|
Note
Keyboard shortcuts are only enabled for the histogram when the mouse cursor is within the histogram.
Camera Alignment
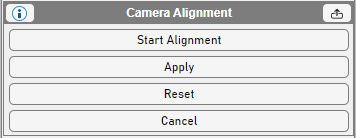
Camera Alignment allows you to scale, shift, rotate, and shear the camera image to so that the features of the image are represented in the correct size, orientation, and position.
The GUI starts with just the start Alignment button visible, but only if a camera has been selected from the Camera Control GUI. When the Camera Alignment tool is active, then the other buttons become visible.
When using the tool, you can define the transform of the image by left clicking to add fixed points, and then dragging them with the mouse.
If a fixed point needs to be deleted, it can be left-clicked to be selected, and then the delete key can be pressed. Up to 4 fixed points
should be used to define the transformation.
Table Column |
Description |
Start Alignment |
Amount of time to elapse between consecutive calls to automatically set the contrast when a Enable Auto Contrast is checked. |
Apply |
After defining the transform by overlaying the camera image onto another context or live image, click this to set it. |
Reset |
This puts the transform back into the state before the alignment was started. |
Cancel |
This puts the transform back into the state from before the alignment was start but also exits the alignment tool. |